In the previous post we did an overview of the different Node.js drivers for Microsoft SQL Server. There was a comparison between different modules for SQL Server and were considered and their advantages and disadvantages
Developers who work mainly with Node.js and open source technologies have experience how to build and debug Node applications. People, dealing with Microsoft SQL Server usually have more experience with Visual Studio and Microsoft platforms. It is also possible to use SQL Server Data Tools with VS
Node.js Tools for Visual Studio:
Node.js Tools for Visual Studio is a good solution if you want to get advantages from both – Node.js and SQL Server ( it is not a requirement – it just make development suing both technologies easier ).
The first public Alpha is released in November, 2013. Beta 1.0 is available from April, 2014 and in July is relapsed Beta 2.0
![]()
Node.js Tools for Visual Studio, aka NTVS, is a free/OSS plug-in that turns Visual Studio into a Node.js IDE. It only takes a few steps to get setup so let's jump right into it.
You need to have installed:
![]()
NTVS supports Editing, Intellisense, Profiling, npm, TypeScript, Debugging locally and remotely (Windows/ Mac OS /Linux), as well Azure Web Sites and Cloud Service.
It id designed, developed, and supported by Microsoft and the community.
The interactive window is part of NTVS
![]()
IntelliSense exposes results of analyzing your programs in three different forms: completions, signature help, and quick info.
![]()
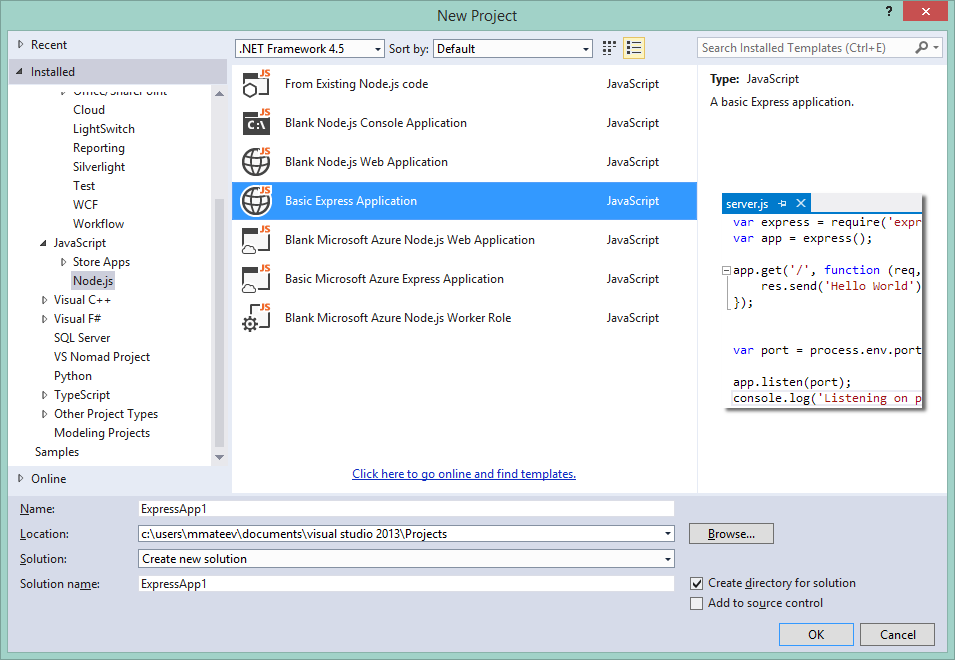
Node.js Tools allows you to create projects using the Visual Studio project system. Project files (.njsproj) reference all the source and content files associated with your project, showing them all in the Solution Explorer window and enabling NTVS to most efficiently work with your files.
![]()
You can use templates to create Node.js projects – console applications, web applications, Node.js + Express apps and Microsoft Azure Node.js apps/
![]()
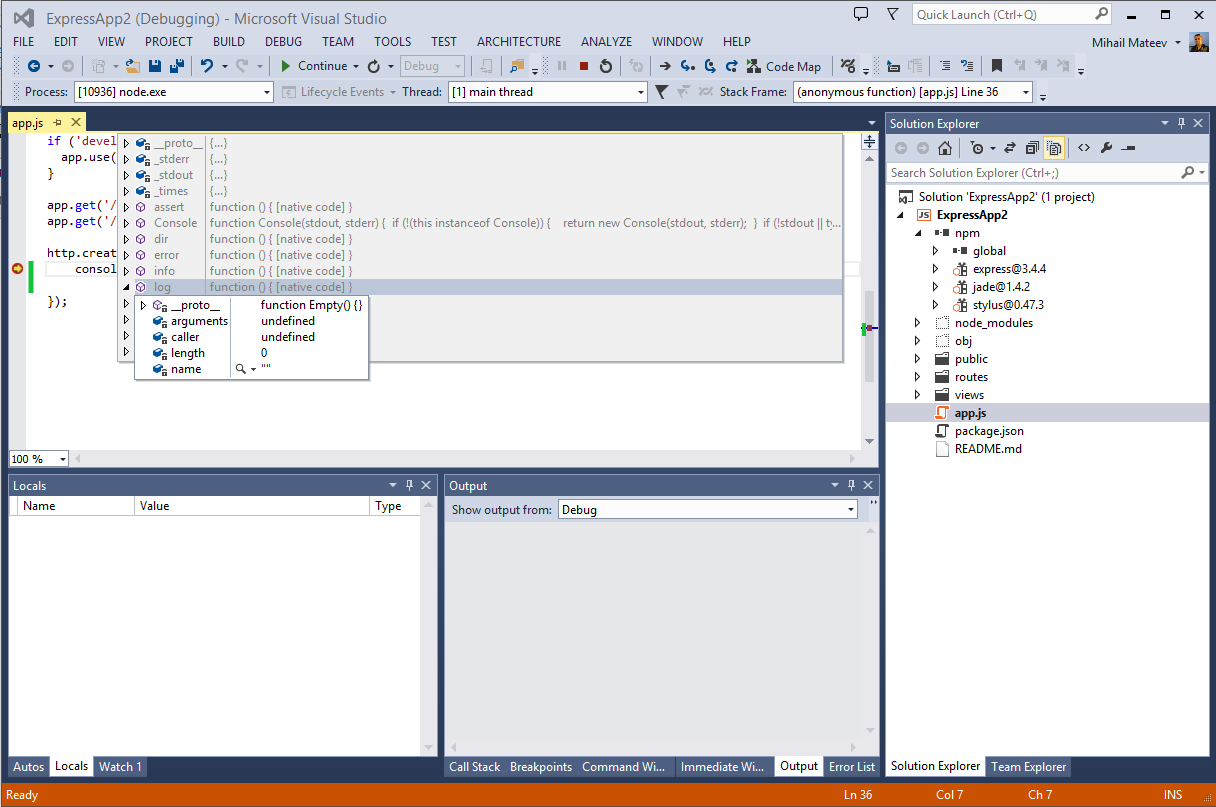
You can also use the integrated debugger in Visual Studio
![]()
Below you can find examples how to start with the most popular Node.js drivers for Microsoft SQL Server
- node-sqlserver-unofficial
The connection string – the example is given with Azure SQL database, but you can adapt it for SQL Server on premises.
1:var sql = require('node-sqlserver-unofficial'); 2:
3:var conn_str = "Driver={SQL Server Native Client 11.0}; 4: Server=tcp:[database-server].database.windows.net,1433;
5: Database=[your-database];
6: Uid=[user]@[database-server].database.windows.net;Pwd=[your-password];
7: Encrypt=yes; Connection Timeout=30;";
Create query using Node.js and node-sqlserver-unofficial
1: sql.query(conn_str, "SELECT TOP 10 FirstName, LastName FROM Person.Person", function (err, results) { 2:if (err) { 3: res.writeHead(500, { 'Content-Type': 'text/plain' }); 4: res.write("Got error :-( " + err); 5: res.end(""); 6:return;
7: }
8: res.writeHead(200, { 'Content-Type': 'text/plain' }); 9:for (var i = 0; i < results.length; i++) { 10: res.write("FirstName: " + results[i].FirstName + " LastName: " + results[i].LastName ); 11: }
12: res.end("; Done."); 13: });
Configuration – how to configure credentials for SQL Server Database with Node.JS + tedious
1:var Connection = require('tedious').Connection; 2:var Request = require('tedious').Request; 3:var config = { 4: server: '[db-server].database.windows.net',
5: userName: '[user]@[db-server].database.windows.net',
6: password: [password],
7: database: ' [database] ' ,
8: encrypt: true// for Azure users
9: }
NTLM support just landed in Tedious driver :
nerdventure.io/sql-server-and-node-js
Execute query using tedious.
1:function executeStatement() { 2: request = new Request( "select 42, 'hello world'", function(err, rowCount) { 3:if (err) { 4: console.log(err);
5: } else { 6: console.log(rowCount + ' rows');
7: }
8: connection.close();
9: });
10:
11: request.on('done',function(rowCount, more) { 12: console.log(rowCount +' rows returned' );
13: });
14: connection.execSql(request);
15: }
Creating a connection to SQL Server using tedious.
1:var connection = new Connection(config);
2:
3: connection.on('connect' , function(err) { 4:// If no error, then good to go...
5: executeStatement();
6: }
7: );
Insert Query, using tedious Node.js driver.
1: connection.on('connect', function(err){ 2:var request = new Request("INSERT INTO MyTable (uniqueIdCol, intCol, nVarCharCol) VALUES (@uniqueIdVal, @intVal, @nVarCharVal)", 3:function(err){ 4:if(err){ 5: console.log(err);
6: };
7: });
8:
9: request.addParameter('uniqueIdVal', TYPES.UniqueIdentifierN,'ba46b824-487b-4e7d-8fb9-703acdf954e5'); 10: request.addParameter('intVal', TYPES.Int, 435); 11: request.addParameter('nVarCharVal', TYPES.NVarChar, 'hello world'); 12:
13: connection.execSql(request);
14: });
Tedious-ntlm is a forked version of Tedious is a work in progress towards NTLM authentication.
Sample connection string is demonstrated below:
1:var tds = require("tedious-ntlm"); 2:
3:var config = { 4: userName: 'dba',
5: domainName: "mydomain",
6: password: 'mypassword',
7: server: 'mssql-server',
8: options: { 9: instanceName: "SQL_Instance_Name",
10: database: "DemoDB",
11: debug: { 12: packet: false,
13: payload: false,
14: token: false,
15: data: false
16: },
17: encrypt: true
18: }
19: };
Connection string / using environment variables
This is the default approach when you are using edge-sql
1: SETX EDGE_SQL_CONNECTION_STRING "Data Source=localhost;Initial Catalog=node-test;Integrated Security=True"
2:
Query MS SQL Server directly using Edge.js
1:var getTopUsers = edge.func('sql', function () { /* 2: SELECT TOP 5 * FROM SampleUsers ORDER BY CreateDate DESC
3:*/ });
Query SQL Server directly using Edge.js / code to set the connections in Node.js
1:varparams = { 2: connectionString: "Data Source=IGBGSOFEV06\\SQLEXPRESS;Initial Catalog=NodeJS;Integrated Security=True“ ,
3: source: "SELECT TOP 5 * FROM SampleUsers ORDER BY CreateDate DESC"
4: };
5:
6:var getTopUsers = edge.func( 'sql‘ , params);
Handle query results ( edge-sql )
1: getTopUsers(null, function (error, result) { 2:if (error) { logError(error, res); return; } 3:if (result) { 4: res.write("<ul>"); 5: result.forEach(function (user) { 6: res.write("<li>" + user.FirstName + " " + user.LastName + ": " + user.Email + "</li>"); 7: });
8: res.end("</ul>"); 9: }
10:else { 11: res.end("No results"); 12: }
13: });
- Execute .NET code to query SQL Server
Edje.js ia a Node.js module, providing native binding to .Net world:
1:var edge = require('edge') 2:var hello = edge.func(function() {/* async (input) => { 3: return ".NET welcomes " + input.ToString();
4:}*/})
5: hello('Node.js', function(error, result) { 6: error && throw error
7: console.log(result)
8: })
It is possible to create .NET library, implementing any queries, that you can create in .NET with ADO.Net and after that to import this library in your Node.js project and invoke methods using Edge.js module.
Create a .NET class library
1:publicclass CSSample
2: { 3:public async Task<object> Invoke(object input)
4: { 5: ....
6: }
7:
8:public async Task<List<SampleUser>> QueryUsers(int pageNumber, int pageSize)
9: { 10: ....
11: }
12: }
1:publicclass SampleUser
2: { 3:publicint Id { get; set; } 4:publicstring FirstName { get; set; } 5:publicstring LastName { get; set; } 6:publicstring Email { get; set; } 7:public DateTime CreateDate { get; set; } 8: }
Import the .Net assembly and use it’s API in Node.js + Edge application ( you should specify the method, that will be invoked )
1:// Set up the assembly to call from Node.js
2:var querySample = edge.func({ 3: assemblyFile: 'EdgeSampleLibrary.dll',
4: typeName: 'EdgeSampleLibrary.CSSample',
5: methodName: 'Invoke'
6: });
Invoke a specified method from Node.js
1:// This is the data we will pass to .NET
2:var data = { pageNumber: 2, pageSize: 3 } 3:
4:// Invoke the .NET function
5: querySample(data, function (error, result) { 6: ....
7: });
The use of Node.js, Visual Studio and SQL Server makes it easy and flexible the creation of multiplatform data centric applications (on premises and in the cloud).
In the next part of this article you can learn how to use Node.js module for Microsoft SQL Server / Azure SQL Database in Microsoft Azure applications (Azure Web Sites and Azure Cloud Services ). We will take a look at the best practices and cover different use cases.
![]()
![]()
If you want more information about how to use Microsoft SQL Server & Node.js feel free to contact me at mmateev@infragistics.com
You can learn more about Azure Bootcamp Bulgaria if you follow us on Twitter @mihailmateev and @Infragistics and stay in touch on Facebook, Google+, LinkedIn and Infragistics Friends User Group !
![]()
![]()


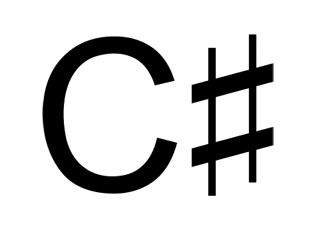 C# is part of the wider Microsoft .NET Framework. The .NET framework is a set of libraries and standards that can be used across a variety of languages (including C#). The framework offers support for a number of user interface, data access and web application libraries and is the primary means of creating modern Windows applications.
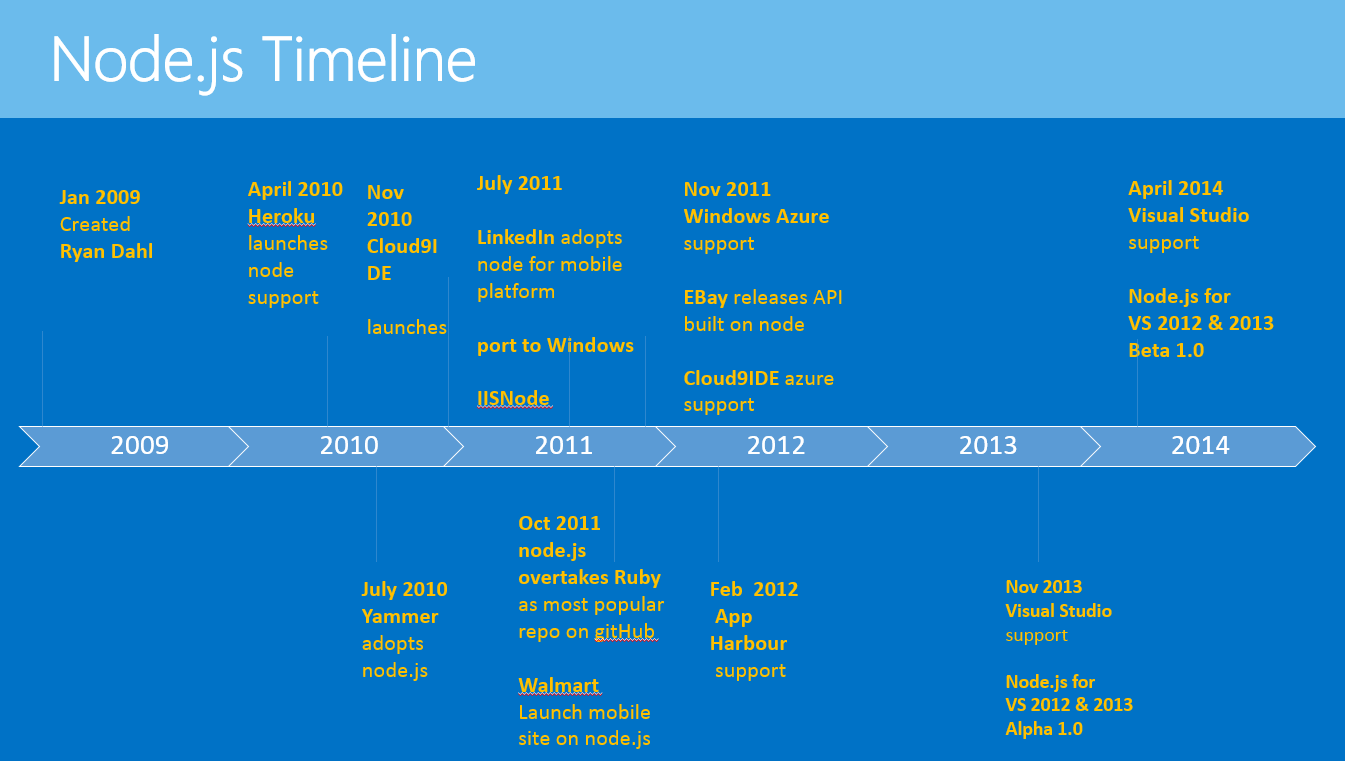


 The event was held on Saturday, July 26th at Best Western Park, Varna , Bulgaria.


.png)