Quantcast
Channel: Infragistics Community
Viewing all 2223 articles
Browse latest View live

Introduction to Systematic Programming – Generative Recursion (Week 8)

$
0
0

Intro to “Introduction to Systematic Programming” Course

Introduction to Systematic Programming – Week 1

Introduction to Systematic Programming - Week 2

Introduction to Systematic Programming - Week 3

Introduction to Systematic Programming - Week 4

Introduction to Systematic Programming - Week 5

Introduction to Systematic Programming - Week 6

Introduction to Systematic Programming - Week 7

Week 8 is the final week of Introduction to Systematic Programming! It’s been a crazy ride and I know I’m a touch behind in the blogging schedule, but I wanted to make sure I got this last blog out to you all before I start working through my next class – Python! Anyhow, here goes, week 8 of Systematic Programming – Generative Recursion!

Lesson 1 – Generative Recursion

Generative recursion is when at each recursive call, you generate new data with each subsequent recursive call. This is as opposed to structural recursion, where you take the next item on a list/from a group. This also means that there is no guaranteed end to the recursion, so that must be addressed in your program/function structure.

Lesson 2 – Fractals

Fractals are images that have a recursive structure, and are sometimes known as “math art.” The example used in this lesson is a Sierpinski Triangle, and it’s essentially a design of triangles that repeats and grows through each recursive call. What’s important to remember when using HtDF for Generative Recursion is that when you run the check-expect, you’re looking at the image produces. This can really help you figure out what your pattern is and correct errors before you get too deep into your code. Additionally, you have to define a constant of “cutoff” to answer the problem of no natural end to the recursive calls!

Lesson 3 – Termation Arguments

Colat’s Conjecture states that:

-          If a # is even, the next is n/2

-          If a # is odd, the next is 3n+1

This fractal is commonly known as “hailstones,” and it’s a recursive function that has no base case. How does it stop? With the 3 Part Termination Argument, of course!

-          Part 1: Base Case – Usually in the Function

-          Part 2: Reduction Step – What is the next problem?

-          Part 3: Argument – The argument is what is the repeated application of the reduction step that eventually results in reaching the base case.

This 3 part termination argument should ALWAYS be used with Generative recursion! You need it in order to end the function!

Lesson 4-12 – Introduction to Search Problems

The rest of the videos in this week are honestly just setup for the students to be able to create a Sudoku puzzle. There’s really nothing relevant to the learning of Dr. Racket or the Intermediate Student Language. SO! I’m going to summarize them by saying:

The search algorithm that is used in this Sudoku solution is the brute force search, which generates all possible solutions and then picks the most ideal one.

Lesson 13: Course Wrap-Up

According to the awesome professor’s summary, what he hopes the students were able to take away from this course on a base level, is how the computational systems in our everyday life function. Additionally, it was intended that the students can now design small programs with confidence! The point here is not that programmers will be infallible, but that mistakes don’t completely derail your design process, and that you always have a tool in your kit to try out to fix an issue.

Next, we went over a bunch of the Recipies in:


Finally, two important questions were answered from the course forums…

  1. Will the HtDF Recipe work in other languages?
  2. The answer given is OF COURSE! It’s important to note though that some languages may have more concise solutions to problems, but the concepts learned in this course do translate and give you a solid base for how to begin any design problem.

Q. What’s the most important thing we learned?

A. How to see structure in code! Being able to identify templates, references, idioms and other higher-level code structures will develop into a strong background in being able to not only code, but in being able to read and understand the code of others.


Week 8 & Course Summary

So overall taking a look back at this course, it was TOTALLY worth the time put in. Although I’m not sure when I’ll ever actually utilize the Intermediate Student Language, I think the concepts of the How to Design Functions recipe are sound. Not only do they work for ISL/BSL, but they, in my opinion, most certainly serve to support the concept of breaking complex problems into smaller, more manageable chunks in order to avoid frustration and feeling overwhelmed. PLUS this class went over a lot of programming basics and helped me to solidify my understanding of tough topics (*cough*recursion*cough*), which will be useful in whatever language or project I decide to tackle next.

All that said, I do believe I passed the course with the requisite stats to gain myself a certificate of completion with distinction, so let’s play some fanfare and get on to the next challenge!

Questions/Comments?

Feel free to comment here on my blog, or find me on Twitter @DokiDara.

By Dara Monasch


Infragistics Test Automation: Ignite UI

$
0
0

Infragistics Testing Automation: IgniteUI Here at Infragistics we have always been invested in ensuring the quality of our products - that is part of how we deliver great experience to our users and, as you know, we do care about that a lot. Over the years we've delved into many platforms and that means we've seen many of the unique challenges many of them present. To put it in other words - we have a whole lot of experience and know-how. At this stage, throw in the fact that for the last few years we've been developing our jQuery controls - Ignite UI - and they have certainly taken a very special place for us. You can imagine we want to keep Ignite UI a quality product, yet testing web tools has always been a challenging task. Thankfully, their extreme popularity has led to the creation of some very good tools to help with that. We were at the ISTA Conference last year and as you may have seen us showing off, Angel Todorov had a session on this subject and there’s some pretty interesting stuff in there so I figured we can iterate a little bit more on that. I think it would be interesting to see the tools used for testing inside the company in a bit more detail. We also have some interesting news regarding those coming very soon!

Automate this!

In my eyes, test automation is pretty much an integral part of quality engineering for any product with long(ish) lifecycle. While you can’t automate everything, doing so returns the investment in the long run by providing excellent, consistent regression testing. Also at ISTA (which literaly stands for Innovations in Software Test Automation), as you’d expect, there were more than a few sessions for web platforms and sans the mandatory old IE joke, there has been one common mention that really stood out to me – Selenium, Selenium, Selenium.

Selenium WebDriverAt this point I believe everyone is aware of how tedious it can be to test under different browsers – it would be extremely inefficient to write tests and use automation tools for each one. Here’s one reason why Selenium is almost an industry standard - that and the fact that browser vendors are in on the project as well. Selenium, to some extent, abstracts away the browser you are dealing with so you can have shared code base for your test cases. Shameless plug: another colleague, Borislav Traikov, wrote an article on Selenium and WebDrivers, so I would skip the details and recommend you check that one out. After that it should be no surprise we are using WebDrivers (or Selenium 2.0) and for a good reason.

What I won’t skip is why this is so important for our testing solution. Our product engineering internally relies on TFS and all the good stuff it brings (e.g. MS Build) so, as you can imagine, we want any testing automation to be an integral part of the products’ lifecycle. Thanks to the .NET implementation of WebDriver(s) tests can be easily written, maintained and most importantly integrated with the build process. Did I mention these also happen to be pretty fast in comparison with other frameworks we’ve tried? That speed and reliability are crucial factors in allowing automated tests to be executed in our Continuous Delivery pipeline – think more than 800 scenario tests[*explained below] run with every CI (Continuous Integration) build and they only take under 30min instead of a couple of hours. That ensures constant, reliable monitoring of quality.

Testing Approach

Now, besides the right tools for the job (of which there are some more below, mind you), there’s the whole approach to the testing process. So what’s the problem in the first place? Well in your usual scenario testing you’d need test beds (the targets for the tests) and it’s one painstaking slow process for creating them. Also, it’s usually somewhat hard to share and reuse code efficiently. You can say that’s partly because test code usually is not easily readable unless you wrote it (depending on platform/tools and implementation), but one thing is for sure – even if programmers can see the scenario in the code, non-engineers are a different story! Anyone else involved with the product like designers (some do code, we know), but most importantly non-technical people as a whole – managers and stakeholders - get nada from looking at test code. That fails this approach on one of the measures for a good test – yes, it may be easy to write with experience, integrated with CI, maintainable and reliable, but it’s hard to verify it’s truly user-focused. There’s a gap between stakeholders and engineers, often required to be filled in by a person that “speaks” both business and code who does the translation.A single aspect of it all, but you can make gold and it’s all to waste if the customer wants plastic. Then there’s also the “joy” of maintaining all the test plans and code in sync...

BDD: Behavior-driven development

So we based our process on behaviour-driven development. Now besides weird spelling options, BDD does provide you with something else. Based on test-driven development (TDD), it combines some parts of the former with ideas from domain-driven design(DDD) and more abbreviations (too much for me already). Point is, it’s sort of intended as a collaboration framework for engineers and business managers and clients. And I’m going to pretty much steal the definition right out of Wikipedia, because it’s this good:

“BDD is a second-generation, outside-in, pull-based, multiple-stakeholder, multiple-scale, high-automation, agile methodology. It describes a cycle of interactions with well-defined outputs, resulting in the delivery of working, tested software that matters.”

Simply put, BDD helps you keep your goals in check (user-focused, remember?) by making tests extremely easy to understand and create by everyone. When you describe a test you do it in a user story-like manner:

“As a [role] I want [feature] so that [benefit]”, where the benefit obviously has business value.

And when you define each scenario (the acceptance criteria) - in a narrative way:

Given [initial context], when [event occurs], then [ensure some outcomes].”

It’s as close to natural language as I’ve seen so far and without some tight specifications, there are options to choose from. It was mostly Ruby and Cucumber that gave BDD large traction. Cucumber understands the Gherkin language, which is more or less like described above. You could use IronRuby, but there are also implementations in multiple languages, the .NET being SpecFlow:

SpecFlow -BDD for .NET

I for one think this is awesome! Once more, some thoughts on SpecFlow shared by Borislav Traikov you might want to check out. SpecFlow is the middle man turning feature files full of scenarios into .NET classes with tests adapted for whatever supported test runner you picked (attributes and all)! So about that Gherkin, let’s make things crystal clear with an actual example:

  1. @p0 @generate-testpage
  2. Scenario: Move a column in the UI to the right
  3.     Given ColumnMoving feature is enabled
  4.     When The ProductID column is moved to the right
  5.     Then The ProductID column index should be 1
  6.     Then The ProductName column index should be 0
  7.     Then The data source should be unchanged

This is very understandable, right? The greyed-out parts are actually parameters for the step definition. Tags on top are freeform text for the most part, except for example a few SpecFlow uses such as ‘@ignore’ which does exactly what you think it does – ignores the marked test. Other tags can have special meaning elsewhere or can simply be used as a way of categorizing and grouping tests. Also they can be placed at both feature and scenario level and can be inherited. We’ll talk some more about those later on.

Now of course, Behavior-driven development tools don’t really do magic – they can’t write test logic for you or execute your test. They are the glue that quite literally binds business requirements to actual code implementations. They do provide quality-of-life support for other tools to help you run your test, but you still need to do some work:

SpecFlow Step Definitions Binding

As you can see SpecFlow makes it really easy to assign real executable testing code to the steps and only means that the generated code for the test runner will be matching and calling this very method when executing your tests. You also get similar attribute-style event hooks for methods to be called before/after test runs and further extended with such for features, scenarios and even steps!

Benefits

  • Limit misunderstanding between groups and promote collaboration – everyone can contribute to testing.

  • Easy to set and change the test runner framework in a SpecFlow test project, which in turn makes it very easy to integrate in CI environments.

  • Quickly automate newly found/submitted bugs. In a test-driven approach creating steps this way actually ‘tells’ the developer exactly what needs to be done for the test to pass. The test output itself again contains the steps with replaced parameters and is just undoubtedly more understandable for non-engineers than a stack trace :)

  • Achieve great reusability out-of-the-box because every step is autonomous  - you even get a nice IntelliSense integration to quickly provide you with steps you might be looking for:
    Specflow Visual Studio Grid Step IntelliSense

  • Very transparent definition of repetitive tasks based on data – in a very similar way to data-driven .NET tests you might be familiar with. Instead of providing actual values in the steps, you put placeholders in a Scenario Outline and then provide a table of Examples the test must be run against. Best of all, underneath SpecFlow will actually generate separate tests for each row – so they can pass or fail on their own and also run in parallel.

  • Most of all, it’s fun!

So you can do everything you always had while automating (sometimes even more), but now there’s this promotion of reusable bits and an elegant, easy to understand layer in natural language (yes, Gherkin is also localized) and everyone can participate in the definition of user-focused tests!

Resources

While this is not a complete description of the process (which we might share soon) you have got to see some of the tools we use and piece it together. We’ll be taking a look at some technical details and execution specifics of the Infragistics testing process next. Also in the mix will be some interesting frameworks of our own, so keep an eye for the next part.

I’d love to hear some thoughts, so leave a comment down below or @DamyanPetev.

And as always, you can follow us on Twitter @Infragistics and stay in touch on Facebook, Google+ and LinkedIn!

Six Great UI Design Pattern Resources

$
0
0

A design pattern is a repeatable solution to a common interface problem. They can be thought of as useful reference guides for particular design or interface requirements. The idea being that, if a problem has been solved well in the past, this knowledge can (and indeed should) be reused.

The web has made it really easy for designers to share such patterns, and a number of really nice resources exist that all good interface designers should be aware of. Here are our top six choices at the moment:

1. UI Patterns - ui-patterns.com

Set up by a Danish designer, this site not only has lots of great design examples, but it also provides neat summaries of the problems being solved and how best to use the solutions. It is really useful for budding designers who are still getting a feel for their role.

A particularly interesting feature on this site is the ability to browse by user, and see all their contributions in one place. It is a shame the site has not been updated for a while, but the quality of patterns available is still worth checking out.

2. Yahoo! Design Pattern Library - developer.yahoo.com/ypatterns

Similar to UI Patterns, the Yahoo! pattern library provides lots of useful annotations about each design pattern (why and when to use, as well as special cases and accessibility considerations). What’s more, each pattern comes with links to code examples, and uses in the real world (on Yahoo! properties and elsewhere). 

3. Designing Interfaces - designinginterfaces.com/firstedition

This is actually a companion site to the book of the same name (the 2nd edition is now available). The book is very deserving of a place on any interface designer’s shelf, and the website is similarly useful. The number of patterns isn’t as great as some of the other sites here, but the quality is extremely high. This collection is put together by the author, rather than being ‘community contributed’, which does show in the quality.

 4. Pattern Tap - patterntap.com

Pattern Tap offers a slightly wider, more eclectic, mix of patterns than the other sites listed here. It offers screenshots of actual websites as well and nothing in the way of notes or annotations.

What it does offer is a wide selection of inspiring ideas. Examples include splash pages, dashboards, and even camera apps. Pattern Tap supports mobile and tablet devices, and includes an easy way to filter search results based on device type.

5. Elements of Design - smileycat.com/design_elements

Similar in concept to Pattern Tap, this site offers a slightly different look at design patterns. Categories include the usual buttons and calendar pickers, but also banner ads and email styles. Examples are shown as screenshots of actual sites. The blog is also well worth a look as well, as it features lots of posts interface designers will find informative.

6. Quince - infragistics.com/products/quince

Quince and Quince Pro are our own pattern library tools. They are designed to simplify the design process and help interaction designers work together in a smarter way. Quince offers a dynamic community that helps designers feel inspired to create beautiful useable designs. Quince Pro builds on the core product, and allows private libraries of patterns to be created and shared in a really easy to use manner.


Infragistics Test Automation ( part 2)

$
0
0

Infragistics Test Automation - Frameworks and executionThus far we’ve made it pretty clear we have devoted a big part of our process to test automation  for both Ignite UI and in general. We strive to make the most out of it by incorporating Behavior-driven development methodology and tools like Selenium 2.0 (WebDrivers) and SpecFlow (Cucumber for .NET). While the latter can solve some of the common challenges, there’s still some we haven’t touched yet – the creation of test beds (which in this context boil down to the actual pages under test). Even though the previous post was more of an overview of some key tools and methods, I’m hoping it gave you an idea how the test process goes and I will add some more details now to fill some missing pieces. Should come as no surprise that at this stage we have a growing collection of Cucumber step definitions, all of them bound to implementations using Selenium WebDriver. It only made sense to take it further by adding additional features and utility and centralize things a bit and so we did!


Ignite UI BDD Test Framework

As a source of many useful step definitions and other utility the framework’s main benefits are the ease of use, the fact that it lets us write tests quickly and most importantly reuse a large amount of the test logic.

Far from being a simple repository for step definitions, the framework also provides the ability to generate test beds directly based on the scenario or background’s “Given” steps and tags. The framework uses SpecFlow’s methods for sharing data (like context injection and scenario context) mechanism to inspect the context and assert scenario tags for meaningful ones to the framework itself. Remember the snippet with Gherkin? The one that contains a “@generate-testpage” tag? Can you guess what it’s for? Yes, that would be the tell-tell sign to create new test bed. They are generated based on predefined templates (also part of the framework) and a model of the Ignite UI widgets you have defined in your Given steps, any features/options you specified and so on. The framework uses various hooks to check tags and the steps themselves to progressively build what you can call a model of the control(s) involved in the scenario. The framework is capable of both HTML pages and full blown ASP.NET MVC test bed generation! Moreover, it manages browser instances, various other test settings, shared widget information though SpecFlows context injection mechanism and pretty much any other utility we deemed necessary for the execution of our BDD tests.

A simple representation of the whole process:

Ignite UI BDD Cucumber framework

Additional WINs for us from using this framework are that the feature files can be the actual test plan itself, the tags add nice semantics to how a scenario is run (which template, data source, category) and automating new features is greatly simplified in the process. Moreover, for the top level intended for everyone, the framework abstracts away the entire technology standing behind test execution – if it’s Selenium running that step, is it MSTest or NUnit based, what browser will it run with – you get steps that clearly state ‘what’ they do without bothering you with the ‘how’.

But wait, there’s more!

Unit tests and headless... awesomeness

You can never have enough, right? While the interaction side is covered by Selenium, API and functionality is, as always, verified by Unit Tests.  And what better tool than QUnit? But with our established process practices, besides keeping it easy for developers to write and execute those locally, we want integration with everything else.

Awesomium + QUnit

In comes the quite awesome Awesomium– It’s as they describe it a “Web UI bridge for native applications”. Besides the many interesting additional things it can do, it is a windowless WebKit that is ideal for executing headless test – such that only run on a layout engine and JavaScript engine. As you might be guessing it does have a very nice .NET API that allows for our QUnit tests to be nicely integrated with builds and also requires no browser windows to be open. That gives us a lean, fast suite even developers can run with their local changes very easily. Oh, and it’s a very mature (read: advanced and stable) project that we found is faster than alternatives such as PhantomJS.

Execution

So, if you remember, every CI build executes the BDD Cucumber tests. Now add to that a task that runs our project incorporating all the QUnit unit tests through Awesomium for both build types. What you get is a constant process of ensuring quality and monitoring for regression. How do you imagine we run all this (considering CI builds are constantly rolling)? Well it does take some muscle – both from hardware and our Engineering Services team :) - and Team Foundation Server and Microsoft Test Manager deliver both on utility, flexibility and integration. While it would be all too much to into greater detail I could point you to this article about Automated Tests. This illustration I believe does a very good job explaining exactly how tests associated with builds run:Test Controller and Test Agents

We are also using System Center Virtual Machine Manager (SCVMM) environment that allows for easy management of multiple virtual machines to perform the roles of controllers and agents. What’s also great about this is that the controller will assign separate tests to run on different agents achieving parallel execution of the suite (that’s why I liked the separate tests SpecFlow generates for scenario outlines so much!).

Sharing behaviours between platforms

A.k.a the Infragistics Cross-Platform BDD Framework. Since the Ignite UI one separates underlying implementation from actual scenario definition (or connects them, however you want to look at it) it wasn’t far from thought to consider such approach for other platforms and even more so a special case of controls – Infragistics’ Data Visualization controls. I mean we have been translating our powerful XAML controls to jQuery for a while now and the range on controls that are shared keeps on growing. Take the Data Chart or Radial Gauge for example – they are essentially the same control so they should have identical behaviour down to smaller details. Therefore, it makes perfect sense for such controls to actually share test steps and some of them do! Guess what other platform also have the very same controls? Windows UI and iOS! And, yes, that means a separate cross-platform framework targeted at our translated controls. While there are some preprocessor directives involved, the main part is introducing a whole additional layer of abstraction where the framework doesn’t really contain the step definitions, but actually sits between them and the actual platform-specific implementations. To further explain this – the framework actually presents a number of assemblies (for each platform), each providing identical utility classes – such that manage control properties, data, SpecFlow argument transformations and so on. That way you get a unified API for step definitions to use, write once and share those very same steps (quite literally by linking the files) across platform test projects and merely assign the respective assembly with helpers and managers:

Organization of the framework usage for sharing BDD tests cross-platform for Infragistics' Data Visualization products

Naturally, it’s not that simple and there are always platform quirks to iron out, but overall it actually is turning out pretty great!

Closing

I’m sure some insight (with a promise for more) got your attention! There’s still an announcement to make that should happen fairly soon so subscribe, follow and all that good stuff to stay in the loop. Useful links are below:

I’d love to hear some thoughts, so leave a comment down below or @DamyanPetev.

And as always, you can follow us on Twitter @Infragistics and stay in touch on Facebook, Google+ and LinkedIn!

What Makes Indigo Different?

$
0
0

As one of the "faces" of Indigo Studio, I often get asked, "what makes Indigo different/special/better than <insert name of other tool>?" It's a fair question--it's not like we are the first players in this game, and everybody is doing interaction design with some kind of tools today.

Indirectly, I've tried to answer this question with our Rationale series of blog posts, but I figured it'd help to try to sum up and provide a list of how I see Indigo being different.

First of all, with UI design, there are literally hundreds of tools that people use--trust me, I know. And I use "literally" in the correct, literal sense here. :) So when approaching Indigo Studio, looking at the vast array of what people use, we had to ask ourselves, "what do we hope to add that these other tools don't?"

Features Don't Matter

That's an exaggeration, but we are talking about user experience, and that's a lot more than features. A feature that Indigo has today could be added by a competitor tomorrow. A feature that a competitor has today could be added by Indigo tomorrow. Sure, features add capabilities that support experiences, productivity, and so on, but when comparing tools, there are a lot more important things to consider more than a line-by-line feature comparison. How is a feature implemented? How does it support an overall story? Do competing products use the same word in the same way?

This last question is especially pertinent in the UX tools space. For instance, a lot of tools claim to do "prototyping," but they often mean that there is some way to do clickable linking of static images. That's hugely different from what we mean when we say prototyping, which is that interactions are the native tongue of Indigo, that they are super easy to add, fully integrated, state-based and/or navigation-based, and that we support rich animations.

So the rest of this post focuses on these qualities--the how we are different, not just comparing features. If you want, you can certainly explore all the Indigo features here.

Holistic Approach

Most if not all of the existing tools on the market are either hacks (e.g., using a basic diagramming tool or presentation tool) or propose to solve one, isolated aspect of interaction design (graphic/visual design, static wireframing, or full on prototyping/app simulation). It's true that some tools have evolved out from their initial core to suit other purposes, but most of the time, those additional capabilities are tacked on and don't feel quite right/native/fluid in the experience of the tool.

With Indigo, a core principle for us is to consider interaction design holistically. Our tool has been envisioned from the get go not as a niche, do-one-part tool but a holistic interaction design tool. This doesn't mean that we literally do everything that fits in a good interaction design process--we couldn't, because a lot of good interaction design activities happen outside of software tooling. But our principle is to tackle those things that make sense to do in software--where there is sufficient value added, and we are able to connect the dots and reduce rework.

Principally, this takes the shape of integration--filling in the gaps between software tools, and doing so in a unified way that fits fluidly in an interaction design process. So far, this has been realized in these ways:

  • Integrated Storyboarding - not only are we the only tool on the market that really does storyboarding, we have made it more feasible to do it by integrating it in with your designs. The live link between screens and storyboards means they are always in sync and up to date, so when you update your UI design, the storyboard is automatically updated to reflect that. Plus, you can easily jump into specific areas of your prototype from your story, which makes helping others understand design intent much better/easier.
  • Blurring the Line Between Sketch/Wireframe and Prototype - the vast majority of UI design tools are static layout tools, either wireframing or visual/graphic design. If there is support for interactivity, it's very basic (clickable PDFs, clickable mockups, linked wireframes). In Indigo, you can start doing quick, lo-fi layouts/wireframes, but adding interactivity is a native thing in Indigo--it even has a no-cost feel to it. You tell Indigo, "when the user clicks this button" and then tell it what to do by just tweaking the screen or navigating to a new screen. And at the end of it, you have both a good set of wireframes as well as a functional prototype. And all of this is as fast or even faster than the best wireframing tools on the market today.
  • Easily Add Interactive Fidelity - sure you can do static clickable screens, but it's a simple matter of dragging a few things around on the timeline to go from instant/abrupt to smooth and animated. Maybe you start static, test that the layout and core interactions work, then add animations to enhance. Or maybe you specifically want to try different animations up front. Your choice--it's there.
  • Easily Share for Free - many tools only let you export to image or document (maybe clickable). Or they have an extra-cost service or integration with some other vendor for sharing. Or you have to find a service on your own to upload your static images into and then setup click throughs. With Indigo, after you've natively made your interactions as rich as you want, with just One Click you can share an interactive prototype that runs on any modern device--we'll host it for free, or you can use your own servers. This facilitates the rapid review and evaluation activities for interaction design.
  • Multi-Platform/Platform Independent - the baseline "Essentials" platform pack in Indigo is a generic collection of interactive, common UI elements. Our default style is a clean, flat grayscale look. You can literally design a UI for pretty much any platform you want with it. Of course we are adding other platform-specific packs (such as iOS) to make designing for specific platforms faster, but the real value here is that you don't have to find, learn, or use different tools to design for different platforms. It's not just for Web, it's not just desktop, it's not just this or that mobile OS. You can design for all of them, with one tool.

Most of these points mean you have:

  • Faster Iterations - you can far more quickly evaluate ideas and iterate to find great solutions.
  • Reduced Rework - because a sketch is a wireframe is a prototype is an animated prototype that can run on any modern device, you can gradually, strategically add fidelity without having to redo your designs in a new tool.
  • Less Costly Changes - you come to a concrete, shared understanding of what you are building much faster and without investing in setting up a code environment.
  • More Time to Find the Right Design

Because this holistic approach is a core principle, it will continue to drive future direction of the tool, and you'll see Indigo bridging more and more gaps as time goes on. We see what many of those gaps are, and we have a plan to tackle them in a way that will continue to feel integrated, native, and fluid and.. right.

User-Focused Prototype Sketching

Another core principle for us is to help our users stay focused on their users. Most tools in the market that come close to offering "real" interaction prototyping (i.e., more than simple static-based click throughs) very quickly dump you into a technology-focused, user-free wasteland. You are asked to think in terms of a target technology in order to effectively use the tool. This typically means two things: a rather huge learning curve to do anything useful with it and having to engage with tons of technical jargon, options, and details that are better deferred until you get to closer to development. Both of these lead to slowing you down and wasting your valuable time.

Because of this, code-free interaction prototyping has gotten a bad rap. People ask, and often rightly so, "why not just start off prototyping in code?" In a sense, that's a valid point--if your prototype tool takes a lot of work and is barely one step above coding anyways! With Indigo, we didn't want to forget that the point of interaction/UI prototyping is to discover what is best for users! To do that effectively, you need be able to bring the experience of making a prototype as close to your users' experience of the prototype, and to do that quickly and iteratively.

Hence we coined the term "prototype sketching" or "sketching prototypes" to communicate the feel we are aiming for. Essentially, making a prototype should feel as much like sketching as possible. It should feel natural, fit the outside-in mindset, and be fast.

In Indigo, we realize this a few ways:

  • Stay on Track with Storyboarding - we enable you to integrate user-focused storyboards with real world context into your UI design/prototyping. This helps keep you focused on the users and their stories--right in the tool. It's easy to get distracted when you start using tools and exploring all sorts of ancillary paths--"ooh, what should this button do?" and you end up spending a lot more time on a prototype than you should before evaluating it. Storyboards help keep you on track--you should prototype a story, evaluate that, iterate, then do another story. (Or a set of few targeted stories.) Don't get caught up filling in every interactive path!
  • User-Focused Interaction Dialogs - the interaction dialogs in Indigo are framed from the user's perspective ("when user <does this> the prototype should <do that>"). It's a very natural way to approach UI design, and it helps keep you in the right frame of mind, more so than "triggers" and "events" and all that sort of thing.
  • User-Flow-Based Prototyping - Indigo frames prototyping in terms of a set of possible user flows. This means it is very easy and natural to quickly design through a given user flow, changing the screen state in response to user actions, and not get distracted from that. You don't have to start from storyboards to do this--it's just the way designing with Indigo works.
  • User-Focused Interaction Flow - as you go along, you are designing what should happen when users do this or that thing. As you design more stories/flows, Indigo keeps track of all that for you and represents it in a very useful flow diagram that helps you understand what paths users can take based on their actions, what will happen, and this helps you navigate and modify your flows much more easily than most other tools.
  • Clutter Free UI - the Indigo interface is designed to add minimal clutter, which means you aren't constantly fighting with and being distracted by a horde of tool panels, properties, lists, and so on. We aim to make most things contextually sensitive--so you only see it when you need it. Every option you see fought for its right to be up in your face.
  • Design It Like You Want It - we strive to reduce abstraction as much as possible. Wherever we can, you can edit in place--so you don't have to find and fiddle with property inspectors any more than necessary. Our state-based interactions mean that you just set up the screen in the designer exactly how you want it to be--what you see is what the users will see.

Modern, Interactive Prototyping

Expectations of users in regards to apps have certainly changed over the years, and yet very few of our UI design tools really support those changed expectations. In fact, in some ways it is remarkable how we manage to work around our extremely limited tools to design rich apps.

Indigo takes this as another starting off point--you should be able to easily and quickly prototype rich interactivity without having to resort to coding. On top of that, you should have a visual aesthetic that suits contemporary sensibilities--it shouldn't look like you are designing a 1990s Web site or a Windows 2000 app, by default. And heck, ideally the tool interface itself shouldn't feel like it was designed in the '90s--talk about working against inspiration!

So we realize this in a few ways:

  • Interactions are Native - select any element, and right there, big and friendly, is an invitation to make that element interactive. Not only that, our state-based approach makes it super fast and easy to make modifications (and only the relevant modifications) to the UI in response to that interaction. You don't have to create special kinds of elements or go into special modes, much less use other tools, to make your designs interactive. There is no managing panels, layers, or anything cumbersome like that--you can easily visualize and navigate the various states you've designed.
  • Adding Animations is Fast and Easy - you don't have to add special libraries or rely on only built-in pre-made animation options. You literally can make any change to the UI animated by just dragging it around on the timeline. And the timeline is designed to keep things simple, so you don't have to feel like you are learning a whole new, specialized tool just to make things animated.
  • Our Default Visual Style is Flat/Modern - hey, that's all the rage right now, right? :) The point is, you don't have to seek out a special add on library of widgets to design something that is clean and sleek. Indigo designs just look good out of the box, and so they make you look good, too.
  • Modern, Interactive Platform Packs - Indigo has been designed to be extensible--to support adding in new UI libraries, much like other tools; however, unlike most other tools, the libraries that we add are fully functional emulations--interactive widgets. So when we add our iOS Platform Pack, it's not just a bunch of pretty pictures--it is really interactive, just like the rest of Indigo, and it is focused on making designing modern, interactive apps for iOS a breeze. We will add more platform packs as well as enable customers to create their own interactive libraries to suit their UI patterns and branding.
  • Our UI is Modern - even though our UI is designed to get out of your way, we still spend time to make sure it is itself clean and modern. When designing modern apps, you should feel like you are working with modern tools.

Experience and Outcomes

Ultimately, what makes Indigo different is about experience and outcomes--your experience of using the tool, how you feel empowered, and the designs you make with it. We focus on having a great, user-focused experience for you, because you are designing things for users. We focus on helping you design things fast with minimal technical overhead, giving you targeted tooling support so that the designs you make are not only functional but also useful, usable, and desirable.

You shouldn't have to be a visual designer to create a good looking prototype. You shouldn't have to be a technology expert to create a highly interactive, animated prototype of a design that is in your head. You shouldn't have to invest days or weeks to create an interactive prototype to evaluate with users. You shouldn't have to waste hours upon hours recreating the same design with different tools to go from one level of fidelity to another. You shouldn't have to wait until the code is done to find out that you need to change the UI. The reality is that despite the glut of UI design tools out there today, you do have to deal with all these challenges. Indigo, on the other hand, tackles these challenges for you head on, and that's what makes it different.

You don't have to take our word for it, though. You can see how it is different by watching our videos, and you can feel how it is different by downloading for free and giving it a try!

---

If you are using Indigo, we welcome your ideas on how we can better apply and refine these and other good interaction design principles to help you to design awesome UIs. If you have any questions or problems, please don’t hesitate to discuss them with us in our forums. We’re also on Twitter @indigodesigned.

About the Author

Ambrose Little is principal design technologist at Infragistics and has worked on Indigo Studio as interaction designer and product manager along with an awesome team based here in Cranbury, NJ, USA and Montevideo, Uruguay.

Infragistics' 1 Millionth Community Member!

$
0
0

One of the best things about working here at Infragistics is the focus on Community. This ideology is central to how our company operates, and it permeates not only our internal organization and structure, but all the way through to our users as well.

In honoring that spirit, this week Infragistics announced the winner of a surprise contest, our one millionth Infragistics Community member! The Infragistics Community is comprised of developers from around the world, with the purpose of forming a collaborative atmosphere for idea transfer as well as problem solving.

When interviewed for our official press release, this one millionth member, Iftehkar Ivann, stated, “I am delighted to be the 1 millionth Infragistics Community member. Infragistics – with its full-featured, beautifully-designed, and well-tested controls – enable my team to focus on our core business objectives and bring our applications to market much faster.”

Iftehkar will receive an awesome prize pack from the Infragistics Community Team, including an iPad Mini, a Kindle Fire, and a full Infragistics Net Advantage Ultimate suite of controls.

As Dean Guida, our Infragistics CEO said, 2013 has been a wonderful year for our Company and I’m sure that 2014 will only bring us bigger and better. I, for one, can’t wait for the Community to be part of it!

Cloud Computing Taking Mobile App Dev to New Heights

$
0
0

Cloud computing and the mobile movement are both influencing how businesses operate and support employees. Cloud-based environments are accessible through the Internet, allowing staff members using smartphones, tablets and mobile PCs to complete work-related tasks anywhere, regardless of their physical location.

Devices powered by Android, iOS and Windows Phone are taking over the office setting, making bring-your-own-device (BYOD) trends more commonplace throughout the corporate setting. These platforms are supported by robust mobile app stores, which can support employee productivity with apps designed for numerous work-related functions.

As more companies support BYOD and cloud computing, they will likely look for ways to create custom apps for Android, iOS and Windows Phone that suit their individual needs. Free and easy-to-use tools such as Android controls, iOS controls and Windows Phone controls are the building blocks that allow businesses to produce highly visual apps that are native to these platforms.

These solutions also do not require users to have an extensive background in mobile application development since there is support from thousands of developers around the net that help firms create their own offerings. Firms can also view sample codes to make the process even easier, especially if this is the first time they are creating their very own apps.

Cloud-based Mobile Market Poised for Impressive Growth

The corporate sector is moving quickly to embrace the possibilities of solutions such as cloud computing and mobile devices. A Visiongain report said that the global mobile cloud market is projected to expand from $77 billion in 2011 to $240 billion by 2016. By this time, mobile cloud revenue will total $45 billion, increasing at a compound annual growth rate of 55 percent beginning in 2011.

The report noted that the adoption of mobile devices and advancement of LTE connectivity are driving this level of growth. The creation of mobile applications is also expected to benefit moving forward.

"Visiongain believes that open standards will make it easier for developers to build cloud based applications that can be used across a variety of smartphones," the market research firm stated. "Issues with mobile cloud security, privacy, feasibility and accessibility remain a major concern for both the customers and the enterprises. However with complex and secure products now available on the market, many enterprises are jumping into the mobile cloud bandwagon."

The advancement of HTML5, OneAPI and BONDI will also have a great impact on the mobile cloud market in the near future, Visiongain said.

Both Mobile & Cloud Among Top IT Innovations

A survey of Fortune 500 CIOs and CTOs by Sierra Ventures found that there are certain technologies that are defining the overall business landscape. Of those polled, 32 percent cited mobile devices and big data as the top IT innovations, followed by 24 percent who named cloud computing and 12 percent who said social media.

According to Tim Guleri, managing director at Sierra Ventures, decision-makers have a lot on their plates when it comes to emerging technologies.

"We found that today, CIOs and CTOs have to wear multiple hats, such as being strategic while keeping up with ever-changing technology advances and maintaining legacy systems," Guleri said. "They have to evaluate risk and be innovative - all while keeping the lights on and the systems up and running."

Supporting these innovative technologies, however, will not be easy for some companies. Sierra Ventures found that 32 percent said a skills shortage is the top impediment to using these solutions, followed by 29 percent who said managing legacy equipment, 25 percent who cited unclear corporate goals and 16 percent that noted scaling new technology will be difficult.

Not all businesses are experts in every aspect of their operations, which includes cloud computing and mobile devices. Businesses should not let skill gaps get in the way of improving how they operate and support a mobile workforce, especially in today's ever-changing corporate landscape. However, with tools such as Android, iOS and Windows Phone controls available, firms no longer have to be pros at everything. These tools allow them to create custom applications that support a range of smartphones, tablets and other computing devices so that workers can remain productive anywhere with an Internet connection.

The 2013 Community Choice Awards!

$
0
0

It’s that time of year once again! Voting season is officially upon us, and we are absolutely delighted to inform you that Infragistics has been nominated for the 2013 Community Choice Awards! The recipients of these awards are determined by you, the voting public. These awards are presented by Penton Media’s SQL Server Pro, Windows IT Pro, and Dev Pro magazines, so as you can imagine, receiving a nomination is quite the honor. If you stand with us and would like to see the many hard-working and dedicated individuals who make up the Infragistics family recognized for their efforts, your vote will go a long way. Take a look at the categories we are nominated for below, and be sure to take a moment to cast your ballot soon since voting ends Friday, September 20!

Vote here for your favorite IT products

Best Mobile & Wireless Software - Infragistics NetAdvantage for Windows UI
Best Free or Open Source IT Tool - Infragistics Indigo Studio

Vote here for your favorite database administration products

Best Business Intelligence & Reporting Product - Infragistics ReportPlus
Best Database Development Tool - Infragistics NetAdvantage Ultimate
Best Free Tool - Infragistics Indigo Studio
Best Vendor Support - Infragistics

Vote here for your favorite developer products

Charting & Graphics Tool - Infragistics NetAdvantage Ultimate
Component Set - Infragistics NetAdvantage Ultimate
Grid - Infragistics IgniteIU Grid
Navigation Control - Infragistics Ignite UI Mobile NavBar
Online Editor - Infragistics Ignite UI HTML Editor
Printing/Reporting Tool - Infragistics NetAdvantage Reporting
Scheduling/Calendar Tool - Infragistics xamCalendar
SharePoint Development Tool - Infragistics Ignite UI
Silverlight Product - Infragistics NetAdvantage for Silverlight
Testing/QA Tool - Infragistics TestAdvantage
Free Tool - Infragistics Indigo Studio
Best Vendor Support - Infragistics

Thanks you for your support!
- The Infragistics Team


FREE Office 2010 Blue Theme for WPF and Silverlight Microsoft Controls

$
0
0

Shhhhh…. Do you hear that?????  That’s the sound of another great FREE theme!

Today’s theme is the highly requested Office 2010 Blue theme.  The Office 2010 Blue theme takes it’s visual cues from the Microsoft Office 2010 product suite.  This is probably the most popular theme among Windows developers.  Why?  Well ,let’s face it!  Most clients want all their apps to look like Outlook and Excel.  Don’t ask me why, they just do.  Maybe they just feel more comfortable with apps that have that Office feel to them.  Because of that, most LOB developers have to provide an “Office” type theme to make their end-users feel all warm and fuzzy inside.  Well, now you can!  I am giving you this awesome Office 2010 Blue theme for Free!

Now remember, there is a catch to this free theme.  I will NOT support every single Microsoft control.  Why?  Well, because I would prefer for you to use Infragistics controls instead.  For example, I will not be providing a style for the Microsoft DataGrid because Infragistics has a much better xamDataGrid control.  You get the idea.

Silverlight

First up is the Silverlight version of the Infragistics’ “Office 2010 Blue Theme”.  We are providing a style for each primitive control that appears in the Visual Studio toolbox, the controls that ship with the Silverlight SDK, and of course some controls from the Silverlight Toolkit.  As you can see, we organized the themes by their respective source so that you have the option to use which ever control you need and not add any unnecessary dependencies on other assemblies.  Here is the list of resource dictionaries you are getting.

image

Adding the theme to your application is very simple.  Just include the resource files for the controls you require the Resources section of your view, or in your App.xaml.

        <Application.Resources>
    <ResourceDictionary>
        <ResourceDictionary.MergedDictionaries>
            <ResourceDictionary Source="Themes/Office2010BlueTheme/Office2010Blue.MSControls.Core.Implicit.xaml" />
            <ResourceDictionary Source="Themes/Office2010BlueTheme/Office2010Blue.MSControls.SDK.Implicit.xaml" />
            <ResourceDictionary Source="Themes/Office2010BlueTheme/Office2010Blue.MSControls.Toolkit.Implicit.xaml" />
        </ResourceDictionary.MergedDictionaries>
            </ResourceDictionary>
</Application.Resources>

Here is the full list of supported Silverlight controls.

  • Accordion
  • AutoCompleteBox
  • BusyIndicator
  • Button
  • CheckBox
  • ComboBox
  • Expander
  • GridSplitter
  • Label
  • ListBox
  • PasswordBox
  • ProgressBar
  • RadioButton
  • Rating
  • RepeatButton
  • Slider
  • TabControl
  • TextBox
  • ToggleButton
  • Tooltip

Office2010Blue-Theme-SL

WPF

Next up is the WPF version of the Infragistics’ “Office 2010 Blue Theme”.  Just like the Silverlight version, we are providing you with styles for the primitive WPF controls that appear in the Visual Studio toolbox, as well as some controls in the WPF Toolkit.  Just like for the Silverlight version, we organized the themes by their respective source so that if you don’t use the WPF toolkit, there will be no need for your code to take a dependency on it.

image

Adding the theme to your application is the same as the Silverlight version.  Just add the resource dictionaries to the Resources section of your View or App.xaml.

<Application.Resources>
    <ResourceDictionary>
        <ResourceDictionary.MergedDictionaries>
            <ResourceDictionary Source="Themes/Office2010BlueTheme/Office2010Blue.MSControls.Core.Implicit.xaml" />
            <ResourceDictionary Source="Themes/Office2010BlueTheme/Office2010Blue.MSControls.Toolkit.Implicit.xaml" />
                    </ResourceDictionary.MergedDictionaries>
    </ResourceDictionary>
</Application.Resources>

Here is the full list of support controls:

  • Accordion
  • AutoCompleteBox
  • Button
  • CheckBox
  • ComboBox
  • Expander
  • GridSplitter
  • GroupBox
  • Label
  • ListBox
  • PasswordBox
  • ProgressBar
  • RadioButton
  • Rating
  • RepeatButton
  • Slider
  • TextBox
  • ToggleButton
  • Tooltip

Office2010Blue-Theme-WPF

That’s All Folks

I hope you enjoy this theme and find it useful.  Go ahead, download the Infragistics’ Office 2010 Blue Theme for WPF and Silverlight Microsoft Controls and let me know what you think.

Be sure to check out the other free themes I have given away.

After you’ve done that, feel free contact me on my blog, connect with me on Twitter (@brianlagunas), or leave a comment below for any questions or comments you may have.

Fundamentals of Python: Functions & Variables (Week 1)

$
0
0

Of course I can never take a break from packing my brain with more information, right?

Right.

In light of that revelation, I bring you my next Coursera foray into programming knowledge, Learn to Program: The Fundamentals, a class on the basics of Python.

Syllabus

This course provides an introduction to computer programming intended for people with no programming experience. It covers the basics of programming in Python including elementary data types (numeric types, strings, lists, dictionaries and files), control flow, functions, objects, methods, fields and mutability. Here is a tentative list of topics.

Week

Topics

1

Installing Python, IDLE, mathematical expressions, variables, assignment statement, calling and defining functions, syntax and semantic errors

2

Strings, input/output, function reuse, function design recipe, docstrings

3

Booleans, import, namespaces, if statements

4

for loops, fancy string manipulation

5

while loops, lists, mutability

6

for loops over indices, parallel lists and strings, files

7

tuples, dictionaries


Based on this syllabus, I’m hoping that what will happen in this course is similar to the last one – I’ll get a great refresher on some concepts that I’m already familiar with, learn the nuances of syntax for Python (which will be new to me!), and also, most importantly, add in new basic concepts to fill in remaining gaps in my current knowledge-base.

Onward and upward to Week 1!

As is pretty typical with any course, this week started out relatively slow, with some prep work to start. Let’s get right into it…

Lesson 1: Welcome to Learning to Program

This lesson was just a short intro to the class, basically covering the syllabus.

Lesson 2: Getting Started – Installing Python

Lesson 2 panned out pretty much as stated in the title. I had already installed Python/IDLE, so I skipped through most of this one.

Lesson 3: Python as a Calculator

Finally we’re getting into some actual methodology! This lesson couples some basic computational expressions with an introduction to working in the IDLE shell. Typical expressions such as -, +, * and / (as with most computer languages, / results in a float) work as expected. New notes are ** for exponentiation and // for integer division. Modulo (%), also works as expected, and operations are performed from the left to right of the equals sign, except in the case where order of operations takes precedence. As usual, ()s will override typical order of operations.

The lesson goes on to give a specific definition to syntax, which I thought was really interesting. The given definition here is that “Syntax is the rules that describe valid combinations of Python symbols,” and that a SyntaxError is a combination of symbols that can’t be evaluated by IDLE.

These SyntaxErrors are in contrast to SymanticErrors, which occur when the *meaning* of an expression is invalid, for example, when you attempt to divide by 0.

Lesson 4: Python and Computer Memory

(Note: It’s explicitly noted that this course will be operating on a “simplified” memory explanation.)

Memory is defined here as “a long list of storage locations, identified with a unique location which is known as a memory address. In the case of variable usage, a variable contains a named location in memory, such as x201, not an actual value. The value is stored in the memory address that the variable points to. Here’s the specifics that are given, which I think explain it a bit more clearly:

A Value HAS a memory addres.

A Variable CONTAINS a memory address.

A Variable REFERS to a value.

A Variable POINTS to a value.

Lesson 5: Variables

Variables are created using assignment statements, such as base = 20 or area = base * height. When a variable changes, the memory address it points to changes, NOT the value at the initial memory address. I think this distinction helps with the previous lesson’s specs.

Rules for Assignment Statements

  1. Evaluate the expression on the right of the = sign to produce a value. This value has a memory address.
  2. Store the memory address of the value in the variable to the left of the = sign.

Legal Variable Names in Python

-          Starts with a letter or _

-          Must contain only letters, digits, or _s

-          Case Sensitive!

Lessons 6: Built-In Functions

As with most languages, Python has a selection of functions that are already written and ready for the developer’s usage. What are they? Well… try this to find out!

dir(__builtins__) <- this="" calls="" dir="" which="" is="" a="" builtin="" as="" well="" produces="" the="" list="" of="" built="" in="" functions="" available="" python="" p="">

help (builtinnamehere) <- produces="" the="" details="" on="" builtin="" that="" you="" put="" within="" s="" p="">

Annnnddd you should be able to figure out everything you need to know about your builtin from there!

This lesson also reviews the rules for executing a function call, as described below:

Rules for Executing a Function Call

  1. Evaluate arguments from left to right, one at a time.
  2. Call the function, passing in argument values

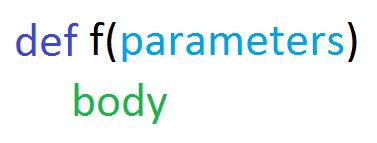
Lesson 7: Defining Functions

I’m going to draw you some pretty pictures for this one. YAY!

First, an example with some color coded notes:

Next, just the color coded context example:

Also included in this lesson are…

Rules for Executing Return Statements

  1. Evaluate the expression, which produces a value
  2. Produce the value as a result of the function call

Nice and simple!

But wait… The function calls we went over in Lesson 6 are actually treated expressions!

What that means is that there are actually more advanced rules…

Advanced Rules for Executing a Function Call

  1. Evaluate arguments to produce a memory address.
  2. Store memory addresses in corresponding parameters.
  3. Execute the body of the function.

Annnnddd there you have it! Phew.

Week 1 Summary

This week went pretty much as expected, which is great because I’m always anxious when getting into a new topic. There’s been some great review of old topics, and even a few new bits in here for week one, like the ** for exponentiation and // for integer division. Overall, I’m definitely excited to see what this course brings and learn some new tricks!

Questions/Comments?

Feel free to comment here on my blog, or find me on Twitter @DokiDara.

By Dara Monasch


What is a Wireframe and Why Are They Useful?

$
0
0

A wireframe is a visual guide that portrays how a page or screen of a website or system may look. Wireframes can range from very unfinished and ‘sketchy’ in appearance, to very polished looking and reflective of how the system will look at 100% completion. Using wireframes can help determine:

  • The structure of a page or screen
  • The layout of content
  • The functionality available
  • Calls to action
  • Blocks of text
  • User interface elements
  • Graphic design touches

The beauty, and power, of a wireframe is that almost every single one is different. Some are used for broadly outlining the structure of a page, and nothing more. Others might consist of a piece of paper with rectangles on it. At the other end of the scale, a very polished wireframe could indicate structure, content, functionality, and even elements of graphic design.

When Are They Useful?

Wireframes are extremely useful in the following situations:

  • To quickly get ideas down on paper for soliciting feedback. This is the real ‘back of a napkin’ use of a wireframe, and can it can be useful in a workshop to document ideas (Use a whiteboard or computer screen, and draw up something rough). The very act of creating this image, this basic wireframe, will prompt people in all kinds of useful ways.

This type of wireframe is often referred to as ‘lo-fidelity’. It can be a few boxes drawn in felt tip, a pencil approximation of a full page, or a computer drawn illustration. The idea though is it doesn’t look finished, because invariably, it isn’t.

  • To communicate the specification of a system or website. This is the ‘a picture paints a thousand words’ concept. Communicating how a proposed system, website, or even simple page of content, should work and look is never as easy as it seems at first. Drawing a wireframe, with the various states outline and suitable annotations, can save a lot of time writing complex paragraphs.

This type of wireframe is often referred to as ‘hi-fidelity’. It normally looks like a recognizable page and can often be very ‘designed’, but still sticks to the core of idea of being an approximation.

Introducing Clients to Wireframes

One area to be careful of is when introducing the concept of wireframes to clients. As we have discussed this is one of the key uses of a wireframe, however, depending on the client, a bit of an introduction might be required first in order to avoid confusion. This is often realized by first explaining what a wireframe isn’t, rather than what it is.Overall, a wireframe isn’t:

  • A finished concept
  • A graphic design
  • An indication of content (text, images, etc..)
  • Necessarily indicative of final layout

A designer friend often likes to amuse his colleagues with the story of a client who, after being presented with the wireframes for a new website, said:

“It looks great but does it have to be grey?”

It’s a funny tale, but a serious point. Wireframes are fantastic, but not everyone understands how and why they can be used. So be sure to introduce the concept, as well as the wireframe itself, so that your client is not left scratching their head.

Heartland DevCon Omaha 2013 Follow-up: Slides, Demos and Video Interview

$
0
0

HDC13Banner

I just got back from another great trip to the US Heartland where I was speaking at the Heartland DevCon (#HDC13) in Omaha. Last year I premiered at #HDC12 my session “iOS Development Survival Guide for the .NET Guy”, which now has become my most popular talk to date. This year I premiered another mobile dev talk at HDC, this time on jQuery Mobile. I also reprised my session “The Great Mobile Debate: Native vs. Hybrid App Development”. Both sessions were extremely well attended, I had great conversations with attendees at the Infragistics booth, and overall I had a lot of fun at the show.

Omaha steaks are also awesome! I finally know where The Drover is.

Gallup Video Interview: All About Mobile

I also had the pleasure of being interviewed by Jim Collison from GALLUP for a live YouTube videocast. Jim & I discussed the world of mobility in general, the new Nokia Lumia 1020, Microsoft's Nokia acquisition, Amazon's potential Kindle Phone, BlackBerry patents, Native vs. Hybrid mobile development, Build vs. Buy in software development, 3D printing, and more.

You can watch the interview using the embedded player below:

[youtube] width="560" height="315" src="http://www.youtube.com/embed/SeQRVpyeDhg" [/youtube]

Event Slides & Demos

If you attended my talks and you’re looking for the slides & demos, they are posted here below as promised.

Cross-Platform Phone Apps & Sites with jQuery Mobile

Native mobile apps have taken all the spotlight in recent years thanks to the introduction of hundreds of thousands of apps in various app stores from Apple, Google, Microsoft and BlackBerry. Apps offer a great native platform experience, but they can be expensive to build and require specific languages, SDKs and skill sets across multiple platforms. Mobile web sites offer a great way to engage with consumers and corporate workers alike without requiring the installation of any app. This session explores the benefits of web development for smartphones using the most popular HTML5 & JavaScript framework for mobile: jQuery Mobile (JQM). We’ll go over a quick primer on HTML5, CSS and JavaScript, followed by everything you need to get started with JQM. We’ll cover the most common development environment options, how to build your first jQuery Mobile page, and how to debug your mobile web code with some of the available tools. We’ll also discuss how to develop a native-like experience on each mobile platform thanks to JQM’s adaptive rendering, and how you wrap a JQM project as a deployable application using PhoneGap. Web development is a critical skill required by every mobile developer; come learn how to get started and reach hundreds of millions of users through a smart mobile web approach.

The Great Mobile Debate: Native vs. Hybrid App Development

It’s not easy being a mobile developer. iOS and Android dominate the market, Windows Phone is climbing into third place, and we’re not really sure if BlackBerry still matters. Do you focus on one platform or many? What size of the mobile population do you really want to reach? Each mobile platform comes with its own programming languages, SDKs, IDEs and application lifecycle & architecture. Are we really expected to learn all of this? Isn’t HTML5 supposed to be the Silver Bullet so we can finally write apps once and run them everywhere? This session will demystify all these questions, walking you through the modern mobile ecosystem, and explore your options as a developer. We’ll review the native story on each major platform, discuss the pros & cons of both mobile native and web development, cover some of the cross-platform solutions available to developers, and explore best practices and guidelines to insure a successful mobile strategy. Don’t just blindly pick a side or assume that “one size fits all”, this session covers one of the most hotly contested debates in modern IT. Come join us and be a part of the conversation.

Until Next Time…

With HDC, the Fall 2013 conference season has officially started. You can catch me and attend more of my talks at the following events over the next few months:


If you have any questions about the topics discussed in these sessions, you can post them in the comments below or contact me on Twitter at @ActiveNick.

BYOD, Cloud Technology and Mobile Apps Can Help Manage IT Costs

$
0
0

Companies are experiencing rising IT costs, which places them in a precarious position if they do not embrace technologies and trends such as cloud computing and bring your own device (BYOD). Both have been connected for some time, especially as more employees demand access to work-related content through their smartphones and tablets from anywhere they are.

The emergence of BYOD has made it necessary for businesses to support a breadth of mobile operating systems, including Android, iOS and Windows Phone. Devices powered by these platforms include robust offerings of mobile applications that can support an individual worker's habits.

Application development can be aided with solutions like Android controls, iOS controls and Windows Phone controls. These options allow firms to create highly visual and functional apps for all of these platforms that meet corporate demands and employee preferences.

A recent Gartner report suggested that cloud computing, BYOD and mobile applications are viable options for firms that want to manage growing IT costs more effectively. The research firm said the global cloud market is projected to total $131 billion in 2013, surpassing $180 billion by 2015.

The use of both corporate-owned and personally owned gadgets is resulting in greater security costs to manage these products. Gartner explained that businesses may benefit greatly from implementing their own enterprise application stores to better manage the influx of various consumer apps entering the workplace.

Firms are Moving Ahead with Third Platform

An IDC report also emphasized the importance of technologies such as cloud computing and mobility, among others. According to the research firm, these solutions all make up the Third Platform, which will be crucial for the continued growth of the IT industry moving forward.

Overall, spending throughout the information and communications technology market will expand from $3.7 trillion in 2013 to more than $5 trillion by 2020. Amy Konary, research vice president at IDC, said that the Third Platform is not only a technological revolution, but a customer-facing one as well.

"As a result, expect the rise of new software business models that align more closely with business outcomes and customers' experiences," said Konary. "Customers should expect to see models that enable access to and consumption of applications when and where they want. Pricing will scale up or down according to consumption or need, allowing customers to pay only for what they use."

Organizations that want to support a mobile workforce should not hesitate to embrace the possibilities of cloud computing and mobile devices, such as smartphones and tablets. The possibilities of supporting such solutions can result in many advantages, especially in terms of employee productivity. Firms that create their own unique applications for Android, iOS and Windows Phone can enable employees to collaborate with coworkers anywhere, and since the cloud is available through the Internet, sharing documents and completing tasks are possible thanks to the cloud's boundless accessibility.

Firms not supporting the cloud, mobility and other technologies may be putting themselves at a serious disadvantage in the near future. In a separate IDC report, Frank Gens, senior vice president at the research firm, asserted that the Third Platform will be responsible for nearly 90 percent of the IT industry's entire growth between 2013 and 2020.

"Companies that are not putting 80 percent or more of their competitive energy into this new market will be trapped in the legacy portion of the market, growing even slower than global GDP," Gens asserted.

Benefits of Semiotics in User Interface Design

$
0
0

Overview

Essentially, Semiotics is the study of signs or symbols and their meanings. It is a science that seeks to investigate how signs are formed and its core concept is to define the transfer of meaning to a sign. It is comprised of three main parts: Semantics which refers to the relationship between a sign and the meaning of what it represents, Syntactics which deals with the formal properties of language and systems of symbols and Pragmatics which deals with the causal relationships between words, symbols and their users. Visual Semiotics in particular, focuses on how meaning is formed through visual signs and what is perhaps the most important aspect that a user interface designer should understand is the relationship between what the users see and the meaning of what they are seeing as well as the context through which they see it.

Benefits

User interface design trends come and go but an understanding of semiotics is timeless and can help us identify which aspect of our designs can be enhanced to reflect a look that is exclusively ours or our clients’. For instance, now that the world has grown tired with the so called skeumorphic design approach which utilizes visual metaphors to reflect the physical objects a digital version intends to replace, the flat minimalist look has caught on so much that it has become the de rigueur design theme to date. Nearly all modern websites or operating systems employ it and as good as it looks, how do we functionally and visually breathe life to a client’s product without making it look like the rest when everything else looks flat and reduced? Applying semiotic concepts such as understanding the intended purpose of a client’s product and the context through which it will be used are considerations that can help us decide whether we need to add a particular background texture, specific font or the use of icons to effectively convey the intended message and provide that extra oomph in our overall design.

Thinking from a semiotic standpoint can also help us produce iconography that effectively and clearly conveys the intended purpose. This is especially crucial for us interface designers because in today’s world where we are faced with the challenge to visually represent large amounts of information and fit them into limited amounts of space that is usually determined by the size of the target device we’re designing for. Interestingly, because the world is globally connected, an important consideration we need to make in terms of iconography is how to effectively represent the given information to the various cultures around the world.

Fig. 1 The examples below shows the three different aspects of icon design qualities that need to 
         be considered to ensure that the intended message is effectively conveyed when creating
         icons. 

Icons

Making Meaning

As design consultants, thinking out of the box is a challenge by itself and satisfying the requirements of our clients is another. As user interface designers, it is our aim to create functional and aesthetically-pleasing interfaces that evoke positive emotions from our clients and users. Regardless of the target medium or platform, a user friendly product that effectively conveys the intended brand message and purpose is what we should constantly strive for and as such, it is imperative that we constantly keep our minds, ears and eyes open to study the various design tools, theories and trends that can help us serve our clients and users better. We must keep in mind that the interface as well as the experience both define the product and to our clients and users, the product is the platform by which we are judged.

Fig. 2 Notice how visual elements such as the arrow and the dotted line help represent the intended message of each sign. 

AD

Who Was Edsger Dijkstra?

$
0
0

Edsger Dijkstra was born in 1930 in the Netherlands and passed away in 2002, leaving behind an impressive legacy in the scientific community that is still alive and well to this day. A Formal Aspects of Computing obituary highlighted the life of Dijkstra and his impact on the programming landscape.

Dijkstra published a three-page article in 1959 titled, "A note on two problems in connection with graphs." The simple algorithm highlighted the shortest path in a graph, leading to it now being called Dijkstra's algorithm.

In 1968, his 70-page essay titled "Cooperating sequential processes" was a major milestone in the field of concurrent programming. The obituary explained that the report included the first synchronization mechanism for concurrent processes. The essay also included the "Banker's algorithm," which helps prevent the instance of deadline in concurrent programming.

All in all, these are but a small slice of Dijkstra's immense work history. Some of his other accolades include receiving the ACM Turing award and being a member of both the Royal Netherlands Academy of Arts and Sciences and the American Academy of Arts and Sciences.

On August 10, 2002, Mario Szegedy reflected on the immense impact left by one of the scientific community's greatest minds. Dijkstra's legacy does not just include his various accolades, but his overall philosophy. Szegedy explained that of the more than 1,000 reports published by Dijkstra, some contained errors, but none were boring because of the "elegant presentation and the convincing power of virtually all of Dijksra's documents spiced with his unique personal style have much contributed to his worldwide recognition."

Edsger Wybe Dijkstra may have passed on in 2002, but it is clear that his contributions in the scientific and programming communities will live on forever through his acclaimed work in the field. 


EmberWatch, Ember.js resource aggregator - HTML5 Resource of the Day

$
0
0

Today’s HTML5 resource is short and sweet, but incredibly helpful if you are trying to learn Ember.js. There are a ton of resources popping up almost daily and it can be hard to keep up with. That’s exactly what today’s resource, EmberWatch aims to help with.

logo

EmberWatch - Ember.js Resource Aggregation

EmberWatch is an aggregation site for the JavaScript framework Ember.js. The categories of things EmberWatch “watches” are: talks from conferences, screencasts, tutorials, books, examples, releases of the framework, podcasts, and libraries that can be used with the framework. I have been working with Ember.js for a few months and there were a lot of things I found at EmberWatch that I didn’t see anywhere else in my learning process.

site

Summary

Finding the right things to aid the learning process can be difficult. This is especially true with emerging frameworks and their rapidly growing communities. As the community grows, the output from the community will grow. Having a site like EmberWatch will help everyone keep track of these resources. I highly recommend adding EmberWatch to your daily or weekly reading just to make sure you aren’t missing out on some great Ember.js content.

Contact

If you want to comment or reach out to me, the best place to do that is on Twitter @brentschooley. I can also be reached via email at bschooley@infragistics.com.

HTML5 App Development Supports Any Browser, Device or Platform

$
0
0

The bring-your-own-device (BYOD) phenomenon has made it necessary for businesses to cater to all types of mobile operating systems, devices and web browsers. The good news is that Android, iOS, Windows Phone, smartphones, tablets, Chrome, Internet Explorer and Safari can all be supported with HTML5 application development tools.

Solutions such as Infragisitcs' jQuery controls help companies create HTML5 applications for all of these platforms and web browsers. These tools allow firms to develop highly visual and touch-based apps that include functionality like panning, flicking, zooming and pinching, which are all hallmarks of smartphones and tablets.

In addition to being a productive way to create applications for all mobile platforms, jQuery controls are also a cost-effective option for businesses with limited development experience or budgets. The free-to-use tools are supported by plenty of developers who can help firms create apps without hiring expensive staff members. Firms that struggle to create their own unique apps should not hesitate to contact these developers for guidance.

Cloud Computing is Greatly Influencing Mobile App Development

As more employees around the world participate in BYOD, businesses will likely have to step up their efforts in terms of mobile application development. Cloud computing may help ease this transition for companies without extensive backgrounds in the app development process.

A report from Visiongain said that the mobile cloud market will expand from $77 billion in 2011 to $240 billion by 2016, thanks in large part to advancements in HTML5 and other industry trends.

"By 2014, technology enhancements such as BONDI, OneAPI and HTML5 will further encourage the development of cloud-based mobile applications," Visiongain explained. "Visiongain believes that open standards will make it easier for developers to build cloud based applications that can be used across a variety of smartphones."

Now more than ever, companies can benefit greatly from the use of cloud-based technologies. The solution makes it possible for employees, regardless of their physical location, to access corporate content anywhere with an Internet connection, and through any device. The fact that the cloud is expected to greatly influence the overall mobile application development field should not surprise any businesses that have followed the advancement of hosted environments.

Firms that want to not only support a mobile workforce with unprecedented access to corporate data, but also support the various operating systems, devices and web browsers, should consider using jQuery controls alongside the cloud. 

What's New in Indigo Studio Version 2

$
0
0

Phew! You have no idea how glad I am to announce that Indigo Studio Version 2 has shipped! :) In this blog post, I'll give you an overview of what's new since V1.0.

Version 1.x Updates

Since we first launched back on 29 November 2012, the team has been hard at work doing many enhancements and, of course, bug fixes. Even though we shipped these enhancements as dot releases to V1, you can really think of them as incremental enhancements leading to the next full major version, sort of like we say we are in the 21st century, even though we are counting 2000s. :)

Here are some of the more interesting value-added updates for V1 (i.e., the "second version" ;) ):

  • Sharing to your own servers - this enables two important scenarios for Indigo users--privately sharing prototypes behind firewalls, controlling when and if your prototype is removed, and being able to "update in place" so that you don't get new URLs for each update.
  • Improved Exporting - along with more sharing options, we added more control (and a better UX) around exporting, including exporting selective parts of a project for others to work on, as well as a new "Quick Snapshot" global feature to quickly grab an image of what you are working on.
  • More Options for Preview/Run - you can now choose to run from your prototype home, the current screen's Start state, current state, and “try interaction” to start at prior state in order to quickly try the interaction you are designing.
  • New PasswordBox - adding a password input box is as easy as a drag and drop now.
  • Distribute/Space Out Elements - you can now easily evenly distribute/space out selected elements.
  • Storyboard Enhancements - we made it much easier for you to quickly bang out stories by dropping in images, and then you can simply double click to start new screens based on them, which is great for making literal sketches interactive.
  • Lots of other little tweaks, enhancements, and bug fixes, but by far, the biggest enhancement we made to V1 was the new HTML5 viewer, so you can now share and run your prototypes on any modern device. That's a big deal, and it was especially important because it paved the way for us to add even more mobile design deliciousness to Indigo.

Related Help Topics & Articles

Designing for Mobile (V2.0)

Indigo Studio Platform PickerBy far the most important addition to Indigo Studio in Version 2 is all of our new support for mobile.

Watch the Video to get a quick introduction to all the new goodies for mobile.

Target Platforms

You can now select a target platform. By default, it is "Generic," which is what was in Indigo V1. That is useful for quick sketches when you are not worried about platform yet. It can also be used for desktop OSes, and pretty much anything else.

What we are adding new are these other choices--browser and numerous mobile devices. Choosing one of these will add that target's "chrome" around your design on the design surface, but it does a lot more than that!

We call the new chrome-related stuff, the "Viewport" because it is more than just eye candy, even though that alone can be helpful to set the context. You can change the transparency of the Viewport chrome--even hide it if you find it bothers you.

The Viewport also supports orientation for mobile devices, so you can easily target one or the other for your design.

The Viewport gives you the visible frame for your target and helps define what is scrollable/pannable. If you use one of the new iOS targets, you will have a fixed-size viewport based on those device sizes; however, if you use Browser or one of the Generic devices, you can specify the target Viewport size (making it easy to target the many Android, Windows, and other devices out on the market).

Once you set your Viewport size, you can then drag the canvas (the white bit ;) ) outside of the viewport to enable scrolling/panning for that target. Once you do that, you can literally drag the Viewport itself to specify what you want to be visible, either initially or in response to an interaction.

Now when you Preview/Run or Share your targeted prototypes, we will intelligently display the target viewport in the browser. For instance, if you are viewing a phone prototype on your desktop browser, we will place the prototype inside the phone chrome, which helps give a closer-to-real experience for those prototypes even in a browser. But when you run the same prototype on an actual phone, we hide that chrome--so it's just like it's running on that device.

So you can see that just the chrome/Viewport itself gives you a good bit of new, useful capabilities for targeting mobile devices.

Related Help Topics:

New Touch Gestures

Indigo Studio Touch Gestures

Of course, supporting targeting mobile platforms makes a lot more sense when you can target touch gestures on those platforms. When you target a mobile platform with V2, Indigo will intelligently offer touch-specific gestures for your prototypes. These gestures can be emulated when viewing the prototypes in a desktop browser as well (e.g., click and quickly drag for swipe), but obviously they work best on the devices! :) Plus, for directional gestures like swipe, you can choose the direction and create specific interactions based on swiping in different directions.

Screen-to-Screen Transitions

Indigo Studio Screen-to-Screen Transitions

If you tried to create mobile prototypes in Version 1 of Indigo, you had to simulate screen-to-screen transitions using state-based animations. You can still do that, of course, but the new built-in screen-to-screen transitions make prototyping common mobile transitions so much easier. And let's face it, you couldn't do "Flip" in V1, but you can now!

As with swipe interactions, you can also define directions for applicable transitions.

You can see some of these touch gestures and transitions in action in our new Expense Tracker sample!

Built-in iOS Support

Indigo Studio iOS Controls

Even though this is one "bullet point" in the new for V2 list, it is a really big one! That's because we don't just give you pretty pictures, we give you interactive controls, over 30 new iOS controls, over 15 new iOS icons, special support for targeting iOS, and a lot of nifty quick-drop positioning helps for the common elements to really speed up iOS prototyping.

The tab bar gives you real tabs that work, as do the Page and Segmented Tabs controls. The Picker and Date Picker look real and work real, both in the browser and on device. The new Content List, Icon List, and List build on top of our awesome Repeater to make it super fast to design common iOS item list layouts. The buttons, badges, icon buttons, and so on all have good defaults but can with a simple selection be changed to look like common iOS variants. Switching between the common color themes is a simple click of a button. And yes, we will be adding iOS 7 support. ;)

You can see this is much more than a simple set of stencils or templates, and we hope you will find that it dramatically speeds up your ability to sketch iOS prototypes in no time!

Run Like an App

On iOS, if you add your Indigo prototype to your Home screen on your iDevice, we put the special sweetness in place so that when you open it from there, it hides the browser chrome and behaves more like an app, which is a great way to test with a feel closer to native, if that is what you are designing for.

Export to PDF (V2.0)

Export to PDF in Indigo Studio

A much requested feature has been the ability to export Indigo prototypes directly to PDF. In Version 2, we add that. The tricky part is how to convert an interactive, multiple-path/branch prototype into a serial page-by-page document format--and we do that for you! Indigo Studio analyzes your screen state flows and will provide a flow-by-flow breakdown in the exported document. And because states are automatically named based on user interactions, in many cases, this should be understandable. It can make walking people through specific paths easier. And while storyboards give you much more control to walk people through, this is automatic! :)

In terms of annotating, we support the optional inclusion of our built-in annotation tools (notes, arrows, and callout numbers). This has the added benefit that the notes you add are (optionally) visible both in the running prototype as well as in the exported document--so you don't have to repeat yourself.

Related Help Topic:Exporting Designs to PDF

Indigo Subscriptions & the Third Version

Version 2.0 is still just the beginning for Indigo. We are already hard at work on new, important goodies that we will be shipping over time, both as 2.x updates and, eventually, Version 3 itself. If you are curious what we'll be working on, our User Voice forums are a good indicator. We are working on what you, our customers, tell us is important to you--so go there and vote, if you haven't already, to let us know what you think we should do next.

With Version 2.0, we go from our introductory free Indigo Studio Version 1 to our paid, subscription-based versions. Our subscriptions are paid yearly, and included in them, you get all minor and major version updates within your subscription year, plus standard support. In addition, unlike some software subscriptions, you get to keep whatever version of Indigo you have licensed at the end of your subscription period.

As we have said since the beginning, Version 1 is free forever--you are under no obligation to upgrade and can keep it as long as you want. However, hopefully you see above both how much goodness we add from version to version, and you are guaranteed both what is in V2.0 today as well as any updates throughout the year of your subscription. Plus, Version 1 users get a huge introductory discount--just watch your inboxes or Check for Updates in Indigo itself for more info on that! Don't wait--it's a limited time offer!

Thanks, and enjoy Version 2--you can try it free for 30 days!

Future Friendly - HTML5 Resource of the Day

$
0
0

Today’s HTML5 resource, Future Friendly is not directly about implementation details. This resource is more about thinking and the way we approach problems on the web as we move forward. The way we have done things in the past will not hold up in the future as standards and technology evolve and the “undersignums” (some of the luminaries in the web space, for sure) of Future Friendly advocate that we begin to change our approach now instead of waiting for the inevitable change to occur.

logo

Future Friendly - A New Hope

The home page of Future Friendly is set up almost like a manifesto that sets up 3 goals for making the future friendly:

  1. Acknowledge and embrace unpredictability.
  2. Think and behave in a future-friendly way. (described in the “Thinking” section of the site)
  3. Help others do the same.

Basically we just need to acknowledge that change is inevitable and act upon this knowledge now as opposed to later. The other areas of the site provide suggestions and resources for future friendly thinking. Some of the concepts in the “Thinking” section of the site include things like Content First and Mobile First design as well as focusing on how data is made available to applications. Definitely check out the Thinking section of the site for more details.

In the spirit of providing resources, I should point out that the site also has a list of “forward-thinking” resources. This list is a collection of all of the links that are mentioned elsewhere on the site. If nothing else, give some of these a read.

Summary

Change in the web world is inevitable. New devices, new web standards, and an ever evolving UX landscape will keep us on our toes at an always increasing pace. It is good to know that many of the great minds in the web dev/design space are thinking ahead. They’re also advocating for us to do the same, and I whole-heartedly agree.

Contact

If you want to comment or reach out to me, the best place to do that is on Twitter @brentschooley. I can also be reached via email at bschooley@infragistics.com.


Ignite-jQuery-650x80

NucliOS Controls for iOS 7 Developers

$
0
0

NucliOS-iOS7Banner

Today marks the general availability of iOS 7 for iPhone and iPad users. The latest version of Apple’s mobile OS sports a new look & feel, along with many great new features for users and developers alike. The NucliOS team at Infragistics has been walking in close step with iOS 7 throughout beta releases over the last few months. We’re pleased to announce that NucliOS now fully supports iOS 7.

Build iOS 7 Apps with NucliOS

Infragistics just pushed out a new service release for NucliOS, bringing iOS7 support for all our iOS developers. This update applies to native Objective-C developers as well as C# developers using Xamarin.iOS. Make sure to download this NucliOS update if you plan on targeting iOS 7 and the new iPhone 5S.

The NucliOS update includes:

  • Support for the newer, cleaner visual style of iOS 7
  • Consistent look & feel between the default Cocoa Touch Controls from Apple and NucliOS controls from Infragistics
  • NucliOS controls are fully tested to work with iOS 5 – iOS 7, allowing you to easily develop apps that target the most iOS devices


If you haven’t tried NucliOS yet, make sure to download the latest version of our Trial version here. If you already own NucliOS, simply head over to your Account page and download the latest service release.

To learn more about the latest features we introduced last Spring in NucliOS release 13.1, read the blog post announcement here. Stay tuned for release 13.2 coming soon, we have a lot of great new controls and features in store for you.

New NucliOS Samples Browser App

We’ve also updated our free NucliOS Samples Browser app with the following:

  • Built-in support for iOS 7’s visual style of controls
  • New parallax effect in the Home screen
  • Full compatibility with iOS 7 on iPhone, iPad Mini and iPad, while still maintaining the original look & feel for iOS 5-6 users


You can download the NucliOS Samples Browser app from the iTunes App Store for free here or using the QR code to the right.

NucliOS Samples Browser Link QR Code-425
Nuclios-SBHome-1280-Cut


Got questions or feedback about NucliOS? Be sure to visit the NucliOS forums, submit and vote for your favorite ideas, or follow @infragistics and @ActiveNick on Twitter.


nuclios-728x90

Viewing all 2223 articles
Browse latest View live